Shops have relied on 1.2080 (D3) tool steel for over 50 years. It stands as the top budget pick for cold-work tooling. You get a material that offers hardness and affordability. Plus, industry use proves its worth. But can it compete with modern alloys? We should look past old habits. Check the actual performance data. Then you can see if this classic grade still belongs in your shop.
What is 1.2080 (D3) Tool Steel
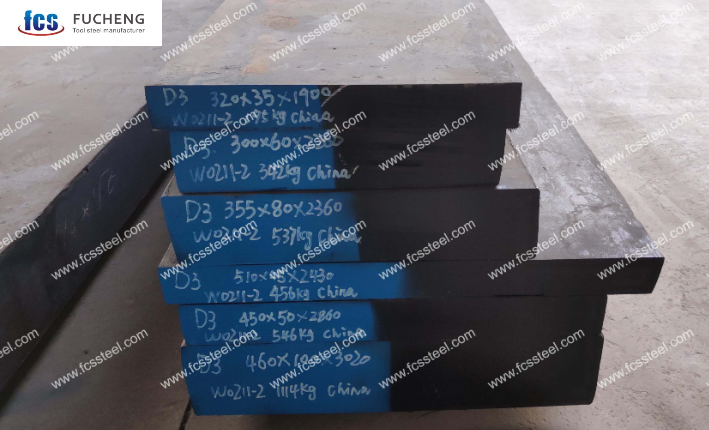
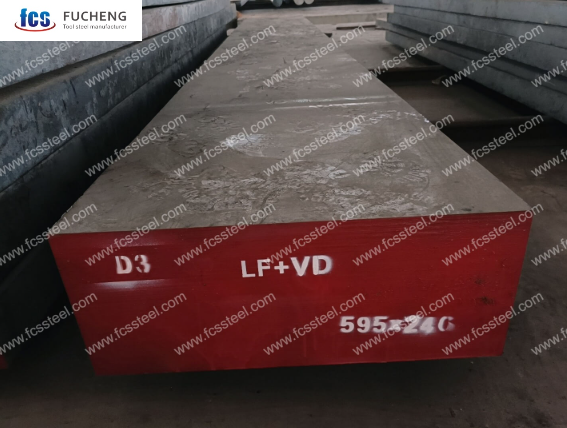
1.2080 tool steel has different names around the world. You’ll find it called D3 in North America. Europeans use X210Cr12. Japanese manufacturers know it as SKD1. China uses Cr12. This can confuse procurement teams buying from international suppliers.
Chemical Composition:
Each standard uses the same composition ranges:
| Element | Carbon (C) | Chromium (Cr) | Silicon (Si) | Manganese (Mn) | Phosphorus (P) | Sulfur (S) |
| Content | 1.90–2.35% | 11.00–13.50% | ≤ 0.60% | ≤ 0.60% | ≤ 0.030% | ≤ 0.030% |
This high carbon-to-chromium ratio gives the material its signature traits. You get maximum wear resistance. But it has less toughness than balanced grades like D2.
Global Standard Equivalents
The core specs stay the same across regions:
| Region | USA | Germany | Japan | United Kingdom | France | China | Italy |
| Standard | AISI / ASTM | DIN / W-Nr. | JIS | BS | AFNOR | GB | UNI |
| Grade | D3 (T30403) | 1.2080 (X210Cr12) | SKD1 | BD3 | Z200C12 | Cr12 | X210Cr13KU |
All these names point to the same high-carbon, high-chromium cold-work tool steel. ASTM A681 puts D3 in the D-series as an oil-hardening grade. It contains about 12% chromium.
Hardness Performance: From Annealed to Maximum HRC
1.2080 (D3) tool steel gives you a wide hardness range. It goes from soft-annealed machinability to extreme wear-resistant surfaces. After soft annealing (810–850 °C, furnace cool), the material starts at ≤230–250 HB. This lets you machine it at about 25% of AISI 1018 free-cutting steel. Drill, mill, and shape blanks before hardening.
Maximum Achievable Hardness
Austenitize at 960–1000 °C and quench (air, compressed air, or oil). This brings as-quenched hardness to 63–66 HRC in small sections (≤30 mm). Thicker parts lose 1–2 HRC due to hardenability limits. Some mills report peak values of 66 HRC without tempering. Most production tools max out at 60–62 HRC for real-world service.
Recommended Working Range and Tempering Response
General tooling runs at 57–58 HRC after hardening and tempering. This gives you a balance between wear resistance and impact toughness (≈28 J/cm² unnotched). The usable range spans 58–64 HRC. Application stress determines where you land.
Tempering temperature sets final hardness:
| Target Hardness | Tempering Temperature | Typical Application Goal |
| 62–63 HRC | 175–190 °C | Maximum Wear Resistance: Precision gauges, light-duty slitting. |
| 59–60 HRC | ≈ 240 °C | Wear–Toughness Balance: General blanking and trimming. |
| 58 HRC | 260–280 °C | Standard Tooling: High-volume stamping and forming. |
| 55 HRC | 480–500 °C | High-Impact Duty: Tools subjected to moderate shock or stress. |
Higher hardness (62–64 HRC) cuts toughness fast. Pick these levels for pure abrasion resistance. Use them where impact risk is low.
Physical and Mechanical Properties
1.2080 (D3) tool steel has a complete set of physical and mechanical traits. These go far beyond hardness numbers. They decide if your dies survive real production cycles. Or if they fail under thermal stress, shock loads, or size changes.
Density and Elastic Behavior
The material weighs 7.67–7.7 g/cm³ (about 7,700 kg/m³). This density is typical for chromium-rich tool steels. Engineers use it to figure out die mass and inertia in high-speed presses.
Elastic modulus (Young’s modulus) measures 190–210 GPa. Most datasheets list 210 GPa (210×10³ N/mm²). This stiffness fights off bending under punch loads. Poisson’s ratio ranges 0.27–0.30. It controls side-to-side strain during compression.
Impact Toughness: The Brittleness Trade-off
Unnotched Izod impact tests show low to moderate toughness:
- 28 J (Otai/ASTM datasheet)
- 77 J (alternative supplier spec)
The wide gap comes from heat-treat setup and test shape. Even the higher number stays well below ductile steel grades. You must avoid shock loading and sharp stress points in your design. D3 works great under steady compression. It cracks under sudden impact or edge hits.
Compressive Strength: The Core Advantage
Many technical datasheets call 1.2080 “very high compressive strength”. This makes it ideal for cold rolls, drawing, deep drawing, blanking, and forming dies. These applications have heavy compression loads. The chromium carbides strengthen the base material. They resist crushing and shape change.
Thermal Properties and Dimensional Stability
Thermal expansion coefficient rises with temperature:
- 10.8×10⁻⁶ m/(m·K) (20–100°C)
- 11.6×10⁻⁶ m/(m·K) (20–200°C)
- 12.3×10⁻⁶ m/(m·K) (20–300°C)
General specs list this as 12×10⁻⁶ /°C. The low, gradual expansion gives great size stability during service and heat treatment. D3 “hardens with very little size change”. Oil-hardening or vacuum/gas quenching in small sections cuts down warping even more.
Thermal conductivity sits at ≈20 W/m·K (room temperature). This moderate–low heat removal slows cooling. High-frequency stamping or high-speed blanking makes friction heat faster than D3 can shed it. You need active cooling, controlled stroke rates, and optimized die clearances to stop thermal softening.
Electrical resistivity measures 0.65 Ω·mm²/m. Specific heat capacity is 0.46 J/(g·K). These numbers count in EDM electrode design and heat modeling.
Quick Reference: Physical and Mechanical Properties
| Property | Typical Value / Range |
|---|---|
| Density | 7.67–7.7 g/cm³ |
| Elastic modulus | 190–210 GPa (210 typical) |
| Poisson’s ratio | 0.27–0.30 |
| Impact toughness (unnotched) | 28–77 J |
| Thermal expansion (20–100°C) | 10.8–12×10⁻⁶ /°C |
| Thermal conductivity | ≈20 W/m·K |
| Electrical resistivity | 0.65 Ω·mm²/m |
| Specific heat | 0.46 J/(g·K) |
Know these properties along with hardness. This lets you predict tool life with precision. Match them to your process loads and heat cycles. You’ll get reliable, cost-smart die performance.
Heat Treatment Process: Critical Temperature Windows
1.2080 (D3) tool steel delivers its promised 60–62 HRC working hardness only if you hit precise temperature bands. Miss the window by 20–30 °C? You’ll under-harden the core or grow grains so large the tool cracks under load. Modern heat treaters use Thermo-Calc software to calculate exact A₁, A₃, and martensite start (Mₛ) temperatures from mill chemistry reports. This cuts out guesswork. It sets tight austenitizing ranges.
Softening Anneal: Preparing the Blank for Machining
Before you cut D3 blanks, you need maximum softness. Anneal at 800–840 °C—just below or a bit above Ac₁ (~723 °C) based on your goal. Full spheroidizing sits below Ac₁. Partial recrystallization uses temperatures just above Ac₁ but below Ac₃.
Holding time follows a simple rule: 0.5–1.0 hour per 25 mm section thickness. Small parts often finish in 1–2 hours total. Longer soaks give more complete carbide spheroidization. This means lower final hardness.
Cooling rate makes the real difference:
- Furnace cooling (~10–30 °C/h down to ≤600 °C): maximum softening, ~150–190 HB for medium-carbon steels. D3 usually lands ~230–250 HB.
- Still-air cooling: much faster (~100–300 °C/h in thin sections). This pushes hardness above 200–230 HB due to incomplete spheroidizing.
- Oil or forced-air quenching: too aggressive for softening. You risk partial transformation to harder phases.
Austenitizing: The 950–1000 °C Decision Point
Hardening D3 requires austenitizing at 950–1000 °C. The exact setpoint depends on chemistry and your hardness–toughness balance target. Tool steels like D3 use Ac₁ + 30–50 °C. This dissolves the carbide network without excessive grain growth.
Industry practice caps the upper limit at 950 °C for most production work. Go above this temperature? The process window shrinks. Grain coarsening speeds up fast. Hot-stamping operations flag 950 °C as the highest safe ceiling because control gets difficult.
Furnace accuracy matters. Standard setpoints run 930–950 °C with operating tolerance ±1.5 °C. Temperature uniformity testing to AIAG CQI-9 standards allows ±15 °C across the work zone. Tighter control cuts hardness variation part-to-part.
Oil vs. Gas Quenching: Matching Medium to Cooling Demand
Your quench choice depends on critical cooling rate. That’s the minimum speed needed to dodge pearlite or bainite formation and hit full martensite.
Oil quenching works best for:
- Section size that demands high cooling rates gas can’t deliver
- Steel with a critical cooling rate that exceeds gas quench capacity (verified via CCT diagrams)
- Jobs needing aggressive nucleate-boiling-stage heat extraction
Keep oil temperature 40–80 °C. Hotter oil slows the quench. This cuts crack risk but also reduces final hardness a bit.
High-pressure gas quenching (4–20 bar N₂ or Ar) suits:
- Vacuum furnace operations
- Thin sections with high hardenability
- Steels where CCT analysis confirms gas cooling curves stay below the critical rate across the austenite-to-Mₛ range
Compare your alloy’s critical cooling curve (from Thermo-Calc or CCT experiments) against measured quench-medium performance. Does the gas curve sit below the critical line through the transformation zone? Gas works. Otherwise, you need oil.
Where D3 Steel Excels
1.2080 (D3) tool steel works best where abrasive wear destroys tools faster than impact. Its high carbon and chromium carbide structure resists grinding, scoring, and edge dulling—but you need to match it to the right job.
Typical Applications & Performance Benefits
| Application Category | Primary Tooling Examples | Core Technical Advantage | Production Impact |
| Blanking & Trimming | Long-cycle dies, Piercing punches, Flash removal tools | Dense carbide network maintains razor-sharp cutting edges | Reduces regrinding frequency by 30–50% |
| Shearing & Slitting | Rotary slitting cutters, Shear blades, Strip separators | 60–62 HRC hardness fights edge rounding and burr formation | Ensures consistent slit width and minimal scrap |
| Forming & Rolling | Profile rolls, Metal spinning rollers, Wire drawing dies | High compressive strength resists deformation under pressure | Extends calibration intervals and tool contour life |
| Precision Gauging | Plug & Ring gauges, Go/No-go fixtures, Inspection tools | High surface stability and low dimensional distortion | Prevents calibration drift at a lower cost than carbide |
Common gauge types include plug gauges, ring gauges, and go/no-go fixtures for high-volume quality control stations.
Critical Limits
We know D3’s carbide-rich structure is great for wear resistance. But honestly? That same structure creates three massive headaches: brittle fracture, terrible machinability, and repair welding that’s nearly impossible. It’s not the “safe choice” for every job anymore. You need to understand these limits before you cut steel, or you might end up scrapping the tool.
Brittle Failure Under Shock Loads
D3 has 2.0–2.35% carbon and 11–13.5% chromium. This packs the matrix with large carbide volumes. CarTech data warns this chemistry makes the steel “notch sensitive and low in ductility.” The material delivers compressive strength above 400 ksi (≈2,758 MPa). But it fails fast under tensile stress or impact.
Aobo’s comparison ranks D3 as the lowest-toughness option among D2 and A2 cold-work steels. The report states D3 contains “massive amounts of carbides, prone to edge brittleness”. It “sacrifices impact resistance and toughness” for maximum wear life.
This breaks tools in several ways:
- Punches with complex shapes: Sharp internal corners concentrate stress. Coarse carbides act as crack starters. Micro-cracks spread along carbide–matrix interfaces during the first few hundred strokes.
- Impact or alternating loads: Drop forging, coining, or interrupted cutting cycles exceed D3’s brittle limit. The tool chips or splits before reaching expected wear-out life.
- Oil-quenched sections: D3 requires oil quenching for deep hardening. The fast cooling rate adds internal stress. Aobo flags D3 as “susceptible to cracking and deformation during heat treatment, unsuitable for tools with complex shapes.”
CarTech notes the grade lacks meaningful tensile data—a red flag. Design engineers use D3 in pure compression applications. Any bending, torsion, or shock load risks sudden fracture.
Poor Machinability Increases Lead Times and Cost
D3’s machinability rating sits at 23–25% of AISI 1018 free-cutting steel (using 1% carbon steel = 100 baseline). MachiningDoctor lists ≈23%. Hudson Tool Steel reports 45–50% of 1% carbon steel—still far below general-purpose grades. Aobo ranks D3 “even more difficult to machine than D2” (D2 ≈ 45%, already rated “poor”).
Here’s what this means on the shop floor:
- Cutting speed and feed drop to ¼ of 1018 levels: Machine a D3 blank at the same setup as mild steel? Expect 4× longer cycle time per part. A simple die block that takes 2 hours in 1018 runs 8+ hours in D3.
- Tool life collapses: Hard chromium carbides chew through carbide inserts and HSS cutters. You’ll burn through 3–4× more cutting tools per job compared to 1018 or even A2.
- Complex cavities make it worse: Deep pockets, fine ribs, or intricate profiles demand slow, multi-pass roughing. Then you face EDM finishing and required stress-relief tempering afterward. Total manufacturing lead time stretches weeks longer than D2 or powder-metallurgy alternatives.
Aobo puts it simply: D3’s alloy elements—added for wear resistance—“make machining more difficult.” The cost gap widens fast on jobs needing tight tolerances or frequent design changes.
Welding and Repair: Almost Impossible Without Special Treatment
High carbon plus high chromium creates a quench-hardened structure the moment D3 cools from welding heat. Skip preheating? You get instant martensite formation in the heat-affected zone. This hard, brittle layer cracks under thermal contraction before you finish the bead.
Standard repair welding fails because:
- Required preheat: You must heat the entire die to 300–400 °C before striking the arc. Small shops don’t often have furnaces large enough for production dies.
- Post-weld annealing needed: After welding, the part goes back into the furnace for full stress-relief annealing (800–840 °C, slow cool). This softens the base metal. You lose hardness everywhere—not just at the weld.
- Carbide segregation: Chromium carbides don’t dissolve during welding. They concentrate at fusion boundaries and cause stress risers. Cracks spread from these zones under load.
Compare this with lower-alloy A2 or even air-hardening D2. Both tolerate repair welding with lighter preheat and simpler post-weld tempering. D3’s chemistry makes field repair next to impossible. A chipped cutting edge often means scrapping the entire tool—or sending it out for expensive rebuilding that includes re-hardening the whole assembly.
Modern Alternative 1: A2 Tool Steel (1.2363)
A2 tool steel (DIN 1.2363, X100CrMoV5-1) cuts chromium content to ≈5% instead of D3’s 12%. This one change shifts the performance balance completely. You give up some abrasion resistance. In return, you get 40–60% better impact toughness and much easier machining.
Chemical Composition and Core Differences
A2 balances wear life with shock resistance:
| Element | Carbon (C) | Chromium (Cr) | Molybdenum (Mo) | Vanadium (V) | Manganese (Mn) | Silicon (Si) |
| Content | 0.95–1.05% | 4.75–5.50% | 0.90–1.40% | 0.15–0.50% | 0.40–1.00% | 0.10–0.50% |
Lower carbon and chromium reduce total carbide volume by a lot. This solves D3’s notch sensitivity issue. The tougher matrix handles complex punch shapes and interrupted cutting cycles.
Hardness and Machinability Gains
A2 hardens to 63–65 HRC as-quenched (air-cooled sections). Standard tempering brings working hardness to 57–62 HRC—same as D3’s range. But the similarity stops there.
Machinability jumps to 65% of W-group tool steels (about 2.8× easier than D3’s 23% rating). Cutting speeds double. Tool life per insert triples. Complex cavity milling takes 12+ hours in D3. With A2 blanks, you finish in 4–5 hours.
When A2 Beats D3
Choose A2 for:
- Complex-shaped punches and dies that crack in D3 during heat treatment
- Impact or coining operations that need toughness above 30 J/cm²
- Prototype or low-volume runs where machining cost matters more than tool wear savings
- Jobs that need repair welding (A2 handles preheat + post-weld tempering without full re-hardening)
You’ll lose 15–25% edge retention in extreme abrasion. But your tools survive shock loads and finish machining on time.
Modern Alternative 2: D2 Tool Steel (1.2379)
D2 tool steel (DIN 1.2379, X153CrMoV12) adds molybdenum and vanadium to the high-carbon, high-chromium base. This creates a different carbide structure than D3’s pure chromium setup. You get better depth hardening. The grain structure turns out finer. Hardness stays stable through thick sections.
Chemical Composition: Mo and V Drive the Upgrade
D2 holds these core elements:
Chemical Composition Analysis
| Element | Carbon (C) | Chromium (Cr) | Vanadium (V) | Molybdenum (Mo) | Manganese (Mn) | Silicon (Si) |
| Percentage | 1.50–1.60% | 11.0–12.0% | 0.90–1.10% | 0.60–0.80% | 0.15–0.45% | 0.10–0.40% |
The 0.6–0.8% molybdenum improves through-hardening. Thick sections (>50 mm) reach 58–62 HRC deep into the core. D3 loses 2–3 HRC in the same size range. Vanadium (0.9–1.1%) forms fine VC carbides. These boost wear resistance beyond what chromium alone delivers. Plus, they refine grain size during heat treatment.
Hardness and Mechanical Performance
D2 delivers 57–62 HRC working hardness after quenching and tempering. This matches D3’s range. But the path there differs. D2 uses air hardening for most production parts. You skip oil quench distortion risks. Annealed delivery hardness sits at ≤255 HB. Pre-hardening machining becomes easier than D3’s typical 230–250 HB range.
Post-heat-treat properties include:
| Parameter | Specification / Data |
|---|---|
| Rockwell Hardness | 57–62 HRC (application-specific tempering) |
| Brinell Hardness | 592–658 HBW (working condition) |
| Yield Strength | ≈1,300 MPa (Annealed state) |
| Tensile Strength | ≈860 MPa (125 KSI, annealed) |
| Impact Toughness | ≈77 J unnotched Izod at 62 HRC |
D2’s secondary hardening behavior (from Mo and V) lets you temper at higher temperatures without losing hardness. You can hit 500–520°C tempering and still hold 58–60 HRC. This relieves stress in the structure better than D3’s low-temperature temper cycle. Dimensional stability gets better too.
When D2 Outperforms D3
Pick D2 for these scenarios:
- Thick-section tooling (>30 mm): Mo boosts hardenability. Heavy blanking dies and large forming rolls get uniform hardness all the way through.
- Air-hardening preference: Complex shapes that warp in oil quench stay stable with air cooling. Secondary grinding operations get cut down.
- Moderate impact applications: D2’s finer carbide distribution handles more shock than D3. It won’t match A2’s toughness. But it survives interrupted cutting and light coining jobs that crack D3.
- Secondary hardening advantage: High-temperature tempering (480–520°C) relieves stress without softening. Tools that see service heat or need post-weld treatment benefit from this.
You’ll spend 10–15% more on material cost versus D3. Machining stays difficult (about 30–35% of 1018 rating—better than D3’s 23%, but still slow). The payoff? You get predictable heat-treat results. Tool life in abrasive, high-tonnage stamping lasts longer.
Modern Alternative 3: Powder Metallurgy Cold-Work Steels
Powder metallurgy (PM) processing solves the carbide segregation problem that holds back standard cold-work steels. PM doesn’t cast molten alloy into ingots. Instead, it turns liquid steel into fine droplets. These droplets solidify as powder particles. Each particle acts like a tiny ingot with uniform composition. Hot isostatic pressing (HIP) packs the powder into solid billets. The result: carbide size drops from 10–50 µm (typical in D2/D3) to 1–3 µm in PM grades. Large carbide bands vanish.
Carbide Refinement and Toughness Gains
CPM D2, Uddeholm Vanadis 4 Extra, and Böhler K390 are modern PM cold-work options. They match or beat D3’s 58–64 HRC working hardness. The fine, spread-out carbides change how the steel fails:
- Longitudinal impact toughness: PM versions deliver 2–4× the energy absorption of standard D2/D3 at 60 HRC
- Transverse toughness:4–10× improvement over cast D2 (old-style grades break apart across rolling direction)
- Chipping resistance: Field reports show 2–3× longer edge life before micro-fracture starts
Vanadis 4 Extra balances wear and shock at 58–62 HRC. High-abrasion grades like K390 pack more carbide volume for extreme cutting jobs.
Real-World Performance in Combined Wear-Impact Duty
Blanking punches in high-strength sheet (1–3 mm) show clear differences:
- Traditional D2/D3: Tool life hits 50,000–200,000 strokes before edge chipping forces replacement
- PM cold-work steel (CPM D2, Vanadis 4): Same job reaches 100,000–800,000 strokes—a 2–4× extension
Precision blanking dies with lateral impact stress see bigger gains. PM grades like Vanadis 8 or K390 deliver 3–5× service life versus standard D2. Some heavy-duty stamping operations report >5× improvement after switching from cast to PM tooling.
Particle shearing blades face two problems: abrasive wear plus repeated shock. PM steels (CPM D2, K294) often last 2–3× longer than traditional D2 at identical edge geometry and heat treatment.
Cost Trade-Off and Selection Logic
PM cold-work steels cost 2.5–4× more per kilogram than D3 or standard D2. But total cost-per-part often drops:
- High-volume stamping (>500,000 parts/year): 2–4× tool life cuts downtime and regrinding frequency enough to justify the premium
- Prototype or low-volume work (<50,000 parts): Stick with D2 or A2—PM’s advantages don’t offset the material price
Use PM for processes that mix high abrasion + impact cycles. The fine carbide structure stops the catastrophic edge fractures that end D3 tool life too soon in mixed-stress jobs.
Selection Decision Matrix: D3 Steel vs Alternatives
Pick your material by matching wear type to impact level in your operation. The matrix below shows 1.2080 (D3) tool steel performance limits against A2, D2, and PM options. We use clear thresholds you can measure.
Wear Type as the First Filter
Pure abrasive wear with low impact energy (<30 J) means D3 is your choice. The steel contains 2.0–2.35% carbon and 11–13% chromium. This packs maximum carbide volume. You get 60–62 HRC working hardness and longer edge life in:
Thin-sheet blanking (≤3 mm)
Precision trimming dies
Roll-forming tooling under steady compression
D3’s 28 J unnotched Izod marks the limit. Go above this? Edge chipping happens in your first production run.
Combined wear plus moderate impact (30–60 J requirement) means switch to D2 or SKD11. These grades lose 10–15% abrasion resistance. But you gain 2–3× toughness. Finer carbide distribution and molybdenum refinement make this possible. High-strength steel punching (>800 MPa tensile) needs this extra toughness. So does thick-plate piercing (>4 mm).
High-impact duty (>60 J) rules out all high-chromium options. Use A2 (65% machinability rating, ~40–60 J impact) for complex punches. Or go with tougher grades like S7 or H13 (80–100+ J). Pick these where shock is the main concern. Wear becomes secondary.
Conclusion
1.2080 (D3) is now a specialist material, not a daily driver. Its high carbon content delivers excellent compressive strength and dimensional stability, making it perfect for precision gauges and low-impact tools under 25mm.
However, for modern high-volume stamping, it often falls short due to brittleness. If your dies face shock loads or heavy abrasion, don’t settle. Upgrading to A2, D2, or PM grades like Vanadis 4 Extra often pays for itself through reduced downtime. Align your choice with your specific failure risks—not just raw material cost—to secure true long-term profitability.