That “unbeatable” price quote for 1.2316 tool steel might be the most expensive mistake you make this year. It is a common industry trap: suppliers exploit chemical similarities to sell you standard 420 stainless as premium 1.2316. On paper, they look close. In the mold, they are worlds apart.
The consequences usually hit months later—when molds rust in cooling channels, fail high-gloss polishing, or crack under pressure. By then, penalties for late delivery and scrapped parts have already destroyed your profit margin.
Don’t jeopardize your project for a phantom discount. This guide outlines six non-negotiable verification methods—from 30-second document audits to definitive lab tests—so you can expose the fraud before the steel ever hits your loading dock.
All chemical and mechanical benchmarks in this guide are based on DIN ISO 4957:2018 for high-alloy cold-work and plastic mold steels.”
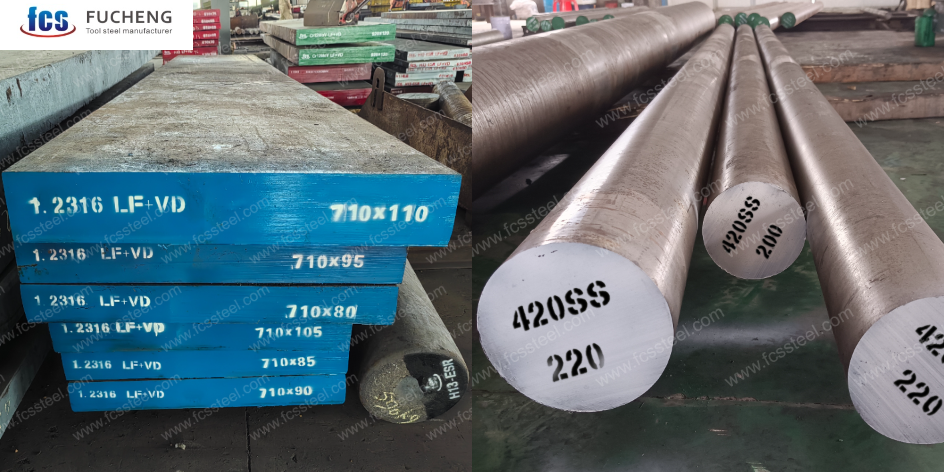
Method 1: Audit the Mill Test Certificate (MTC) for Forgery
Paperwork is the easiest thing to fake. Before you inspect the steel, inspect the PDF. Dishonest suppliers often manipulate Mill Test Certificates (MTC) using basic editing software to mask the true identity of cheaper 420 steel. Don’t just “file” the certificate—audit it using these document forensics techniques.
1. The “Name Game”: Spotting Inferior Grades
The first trick is linguistic. Suppliers prioritize internal codes or American standards that look “close enough” to 1.2316. Scan the “Grade” or “Material Designation” field immediately.
✅ ACCEPT: 1.2316, X38CrMo16, or X36CrMo17.
These are the specific designations for the high-molybdenum grade you paid for.
🚩 RED FLAG: 1.2083, 420, X40Cr14, or X42Cr13.
If you see these, stop. 1.2083 (AISI 420) is a standard stainless steel without the molybdenum boost. It is not an equivalent. If the MTC says “1.2316 / 420” combined, demand clarification. They are chemically different materials.
2. The “Photoshop” Check: Signs of Document Tampering
Many “stockists” buy generic steel and overwrite the manufacturer’s data. Look closer at the digital file:
Font Consistency: Do the chemical values (like Mo content) use a slightly different font or size than the rest of the text? This is a classic sign of digital alteration.
Clean Zones on Dirty Scans: Is the document background scans with noise/specks, but the area around the “Standard Designation” is perfectly white and clean? Someone likely erased the original grade.
The “Typical” vs. “Actual” Trap: Does the certificate list “Typical values” instead of specific measurements for that batch? Valid MTCs must show actual test results for that specific heat number.
3. The “15/1” Quick Scan Rule
You don’t need to memorize the entire periodic table. To verify 1.2316 on paper, just scan the chemical composition column for the “15/1” rule:
Chromium (Cr): Must be >15%. (420 steel usually stops at 13-14%)
Molybdenum (Mo): Must be >0.8% (ideally ~1.3%). (420 steel is 0% or trace)
If the certificate shows Molybdenum at “0.05%” or blank, no amount of arguing makes it 1.2316. It’s the wrong steel.
4. Verify production Route (ESR Verification)
If you paid for premium ESR (Electro-Slag Remelting) quality—essential for high-polish molds—the paperwork must prove it. Look for the process route codes: EAF + LF + VD + ESR.
Warning: If the MTC only lists “EAF” (Electric Arc Furnace) or “VD” (Vacuum Degassed), you received standard steel. It will likely fail during high-gloss polishing due to higher inclusion rates, even if the chemistry is correct.
Method 2: Chemical Composition Testing (OES/XRF Analysis)
Lab tests remove all guesswork. While paperwork can be forged, the steel’s molecular makeup cannot lie. OES and XRF tools measure the exact element makeup in seconds, exposing fake 420 steel immediately by catching the chemical “fingerprints” that fraudsters try to hide.
Choose the Right Testing Technology
OES (Optical Emission Spectroscopy) is your definitive tool. This spark-based method analyzes everything, including Carbon. Use this if you need to certify the material legitimately.
Handheld XRF (X-Ray Fluorescence) is your quick-check tool. It’s non-destructive and perfect for screening incoming bars on the truck. Note: XRF cannot measure Carbon accurately. It’s great for spotting missing Molybdenum, but you’ll need OES to confirm the steel grade’s carbon baseline.
The “Deal-Breaker” Elements: When to Reject
Since you have already verified the full specification in Method 1, use your chemical analysis to hunt for deviations. Don’t get lost in the minor trace elements. Focus on these two specific “fraud indicators” that separate genuine 1.2316 from cheap 420:
The Molybdenum Trace (Critical)
Standard 420 steel contains zero Molybdenum, whereas genuine 1.2316 relies on it for pitting resistance.
🚩 REJECT IF: Result is < 0.70%.
If your readout shows trace amounts (0.1% or near zero), you are 100% holding rebranded 420 steel.
The Chromium Gap
While both grades are stainless, genuine 1.2316 must hit the high-chromium threshold (15%+) to function correctly.
🚩 REJECT IF: Result is < 14.5%.
Downgraded substitutes typically hover around 12–13%. That missing 2–3% creates a massive drop in corrosion resistance.
Secondary Consistency Checks
If the primary elements pass, verify the batch consistency. Carbon generally sits between 0.33–0.45%. Anything below 0.25% indicates a generic stainless steel. Also, watch for Sulfur (S); while high sulfur improves machining, levels unexpectedly spiking above 0.040% often suggest dirty, low-quality scrap recycling rather than premium steel production.
Proper Sample Preparation
Don’t waste time on bad data. Surface condition controls accuracy. Grind a flat, clean spot (at least 20mm diameter) to remove all rust, scale, and decarburized layers. Run 3–5 separate burns and average the results. A wide spread between readings tells you the material is segregated and poor quality—even if the average looks okay.
Method 3: Hardness and Through-Thickness Uniformity Test
Premium ESR-refined 1.2316 gives you consistent hardness from surface to core. Cheap substitutes or low-quality batches create uneven hardness levels. These differences hurt machining speed. They also cause parts to shift size during production. A full through-thickness hardness test catches these quality problems early. You’ll spot issues before running production molds.
Define Your Pre-Hardened Acceptance Bands
Real 1.2316 tool steel comes pre-hardened in these standard conditions:
- Pre-hardened:28–34 HRC(approx. 270–325 HBW): Yield Strength Rp0,2 800-900 MPa.
- Tensile Strength (Rm): 950–1150 MPa.
- Heat-treated alternative spec: 30–36 HRC post-tempering
- Annealed maximum baseline: ≤235 HB
Your supplier claims “uniform hardness across all dimensions”? Check this with real measurements. Pre-hardened material should sit around 30 HRC nominal. Numbers outside 28–34 HRC mean processing errors. Or you got the wrong material.
Test Three Critical Positions Across Thickness
Cut a test piece from the production block thickness. Measure hardness using Rockwell C (HRC) at these points:
- Edge zone: 5–10 mm inside the surface
- Mid-radius: Half the total thickness
- Center: Along the plate centerline
Take minimum 3 HRC readings at each spot. Average the numbers for each position. This removes random scatter. You’ll see the real uniformity pattern.
ESR-grade 1.2316 keeps hardness variation ≤ ±1 HRC across the full section. Standard (non-ESR) 1.2316 shows ±2–3 HRC difference between edge and center. Total spread over 4 HRC? That’s a sign of bad refining quality.
Set Pass/Fail Criteria Based on Steelmaking Route
| Example Type | Edge (HRC) (5-10mm deep) | Mid-radius (HRC) | Center (HRC) | Total Range (HRC) | Tensile Strength (Rm) | Evaluation |
| PASS (Genuine ESR 1.2316) | 29.5 | 30.2 | 30.7 | 1.2 | 950 – 1150 MPa | Acceptable |
| FAIL (Fake or Non-ESR 420) | 28.0 | 30.5 | 32.2 | 4.2 | < 850 MPa | Rejected |
Average hardness might look fine. But a large gradient points to non-uniform microstructure. This causes machining trouble. Tool life gets unpredictable. Size stability during heat cycles drops too.
Prepare Test Surfaces the Right Way
Grind or polish the test area smooth before you measure. Remove all decarburized layers, scale, coatings, and heat zones from cutting. Too much grinding heat gives false low readings. The surface must be flat enough for good Rockwell C contact. Bad prep wastes your testing money. Plus, it hides real defects in the material.
Method 4: Metallographic Structure Analysis
Chemical tests can’t show you everything. Microstructure reveals the internal crystal arrangement that defines how the material performs. Metallographic analysis shows you carbide distribution patterns, martensite formation quality, and retained austenite levels in heat-treated 1.2316. These microscopic features separate premium ESR-refined steel from downgraded 420 substitutes or bad processing batches.
What Real 1.2316 Microstructure Should Show
Real 1.2316 tool steel gives you a fine martensitic matrix with well-spread carbides after proper heat treatment. The high chromium (15.0–17.5 %) and molybdenum (1.00–1.30 %) content creates specific carbide types. You’ll see small, well-scattered chromium carbides (M23C6) and molybdenum carbides (M2C) throughout the structure.
Target microstructure characteristics:
- Martensite morphology: Fine, tempered martensite needles with uniform size
- Carbide distribution: Dispersed chromium and molybdenum carbides, size range 1–3 µm
- Carbide banding: Minimal segregation lines; ESR-grade shows near-zero banding
- Retained austenite: ≤5–8 % volume fraction after standard quench-temper cycle
- Grain size rating: ASTM 7–9 (fine grain preferred for mold applications)
Fake 420 steel shows coarser carbides with uneven spacing. No molybdenum means no M2C carbides at all. Standard 420 produces larger chromium carbides (5–10 µm) that cluster along grain boundaries. This clustering reduces toughness. It also creates polishing problems.
Laboratory Preparation Protocol
Cut a 10 × 10 mm sample from the production heat-treated block. Mount the specimen in conductive resin. Grind through 320, 600, 1000, and 1200 grit papers in sequence. Polish with 3 µm and 1 µm diamond paste to mirror finish.
Etch the polished surface using Vilella’s reagent (1 g picric acid + 5 ml HCl + 100 ml ethanol) for 10–20 seconds. This reveals carbide structure and martensite boundaries with precision. Examine under optical microscope at 500× magnification minimum. Capture images from 5–8 different fields for statistical comparison.
Red flags in microstructure analysis:
- Heavy carbide banding across multiple fields (poor cleanliness)
- Excessive retained austenite pools over 12 % (wrong heat treatment or composition)
- Missing fine Mo-carbides (confirms 420 substitution)
- Grain size coarser than ASTM 6 (low-quality processing)
- Compare your microscopy images against certified 1.2316 reference standards. Structure problems mean material or processing failures. Lab certificates won’t catch these issues.
Method 5: Corrosion Resistance Test (Salt Spray)
Real 1.2316 has chromium and molybdenum that resist corrosion. Fake 420 steel can’t match this. Salt spray testing shows this gap in 24–72 hours. This test mimics years of humid exposure in a lab. You’ll see rust patterns that prove if the material is real.
Industry-Standard Salt Spray Test Protocol
Follow ISO 9227 or ASTM B117 specs. Both use 5% NaCl (sodium chloride) mist at 35°C spray. This harsh setup speeds up corrosion. You can see how material holds up in coastal factories, tropical climates, or humid mold-cooling channels.
Basic test steps:
- Clean sample surfaces with acetone or isopropyl alcohol to remove oils and dirt
- Place samples at 15–30° angle in the test chamber
- Spray for your target time (24–1000+ hours based on grade claim)
- Rinse samples with deionized water after exposure
- Check rust formation, pitting depth, and oxidation coverage
High-performance plastic mold steel needs 72-hour resistance minimum with no visible rust. Premium uses need 1000+ hour exposure. Real ESR-refined 1.2316 hits Corrosion Class 2–3 on the 0–5 scale. Lower numbers mean better resistance.
Real 1.2316 Performance Benchmarks vs. Lower Grades
Real 1.2316 tool steel fights corrosion two ways. The ~16% chromium forms a protective oxide layer on the surface. The ~1.1% molybdenum stops chloride pitting in acidic conditions. These elements work together for top performance.
ESR-refined 1.2316 stays clean for 60+ hours exposed to water in coolant channels. You’ll see zero flash rust. Standard vacuum-degassed 1.2316 gets surface rust spots in 48 hours under the same conditions. ESR refining removes non-metallic bits that start corrosion.
Lower-grade 420 steel fails faster. No molybdenum means pitting starts at 24–36 hours in salt spray tests. Less chromium (~13% vs. 16%) speeds up rust. Surface rust shows as red-brown marks on the test sample. Pitting makes small holes that get deeper over time.
Method 6: Machinability and Polishing Behavior
Sometimes, the machine shop knows before the lab does. If you can’t access advanced chemical testing equipment, cut a sample and run actual machining or polishing cycles. The way the steel behaves under a tool is often the “tell-tale” sign of its true identity. Authentic 1.2316 is formulated for consistency; the lower-grade substitutes tend to fight the operator.
Machinability: Consistency vs. Chaos
When you machine the genuine high-molybdenum grade, you should experience a “short code” chip formation and steady tool wear. Thanks to its specific sulfur range and uniform microstructure, it allows for aggressive feed rates even in a pre-hardened state (28–34 HRC).
The “Impostor” Signs:
Hard Spots: Does the cutter scream or chatter unexpectedly? Rebranded 420 often suffers from segregation, creating patches of soft ferrite (24 HRC) mixed with hard martensite zones (35 HRC).
Inconsistent Surface: If you see “shadows” or changing textures on a milled face despite constant settings, the material structure is uneven.
Tool Life Drop: If inserts are chipping halfway through a standard run, you’re likely cutting dirty, recycled stainless steel rather than the clean alloy you purchased.
The Polishing Stress Test
This is where the cheap material fails completely. 1.2316 is famously chosen for its ability to take a high polish for optical or clear parts. Cut a 50×50 mm sample and push it to a mirror finish.
Authentic Material Performance:
It should polish progressively. You move from 320 grit up to 8,000 mesh diamond paste with predictable effort. The result is a clean semi-mirror surface (Ra ≤0.05 μm) suitable for most clear plastics.
Substitute Material Failure Mode:
When you try to polish the inferior substitute, two things usually happen:
- The “Orange Peel” Effect: The surface gets bumpy instead of smooth as you work it longer. This is caused by the coarser grain structure of standard 420 steel.
- Pitting: You see tiny pinholes that won’t polish out. In non-ESR 420 steel, these are large inclusions being ripped out of the surface.
Quick Comparison: Polishing Limits
| Feature | 1.2316 (Genuine) | Standard 420 (The Fake) | S136H (ESR Premium) |
|---|---|---|---|
| Max Polish | ~8,000 mesh | Struggles at 4,000 | 14,000+ mesh |
| Effort Level | Low / Consistent | High / Frustrating | Medium |
| Visual Defect | Rare | Frequent Pitting | None |
If your polishing technicians complain that the steel “just won’t clear up” no matter how much they work it, stop the process. You likely have a material with low purity levels intended for structural parts, not molding.
Conclusion:
Material fraud is a costly trap, but it is completely avoidable. You now have six proven methods to distinguish premium 1.2316 from downgraded 420 substitutes. Don’t rely on luck—rely on data. If a supplier hesitates to provide clear certification or refuses third-party testing, that is your signal to walk away.
The cost of a simple lab test is nothing compared to the reputation damage of a failed mold. Protect your bottom line today. Download the Supplier Vetting Checklist below and verify every bar before it enters your workshop.